In this field note16 sections +Close −
- 01Quick comparison
- 02Shared approach through the Baltoro
- 03Broad Peak normal-route character
- 04Gasherbrum I normal-route character
- 05Technical and objective hazard comparison
- 06Camp and rotation strategy
- 07Weather and summit windows
- 08Experience standard
- 09Oxygen and high-altitude support
- 10Schedule and logistics
- 11Price comparison
- 12Training focus
- 13Choosing the right peak
- 14Decision checklist
- 15Internal planning links
- 16Frequently asked questions
Broad Peak and Gasherbrum I are both Karakoram 8,000ers approached through Askole and the Baltoro, but the similarities end before the climbing begins. Broad Peak’s normal route is generally the less technical of the two, with a notoriously long summit ridge. Gasherbrum I—also called Hidden Peak—requires a deeper glacier approach and more complex steep climbing on its normal route.
For a climber choosing a next 8,000-metre objective, this is not a comparison between “easy” and “hard.” Broad Peak remains a severe high-altitude expedition. Gasherbrum I raises the technical and logistical demand. The proper choice depends on recent route-specific skill, altitude performance and support style.
Skardu briefing point: If the climber’s résumé is described only by summit height, we do not yet know enough. We need to know the route, conditions, responsibility and whether the climber descended independently.
Quick comparison
Factor | Broad Peak | Gasherbrum I |
|---|---|---|
Elevation | About 8,051 m | 8,080 m |
Common character | Snow and ice route with a long summit ridge | Steeper and more technical snow, ice and mixed climbing |
Approach above Baltoro | Broad Peak side of upper glacier | Deeper through the Gasherbrum glacier system |
Signature challenge | Distance and time from fore-summit area to main summit | Technical route finding, steep sections and complex objective hazard |
Typical experience fit | Strong first or next 8,000er candidate | Experienced 8,000-metre climber with stronger technical résumé |
Support complexity | Major expedition | Major expedition with deeper base-camp and route logistics |
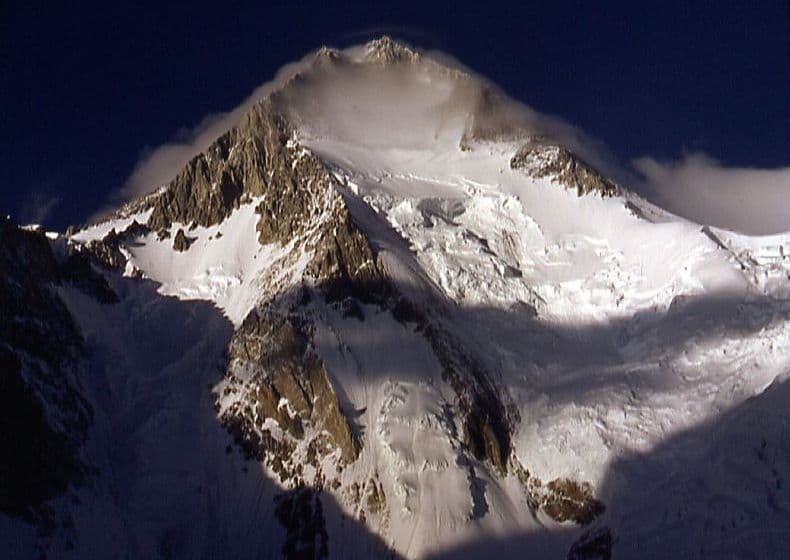
Elevations can vary slightly between publications. Those differences are operationally insignificant compared with route conditions and camp placement.
Shared approach through the Baltoro
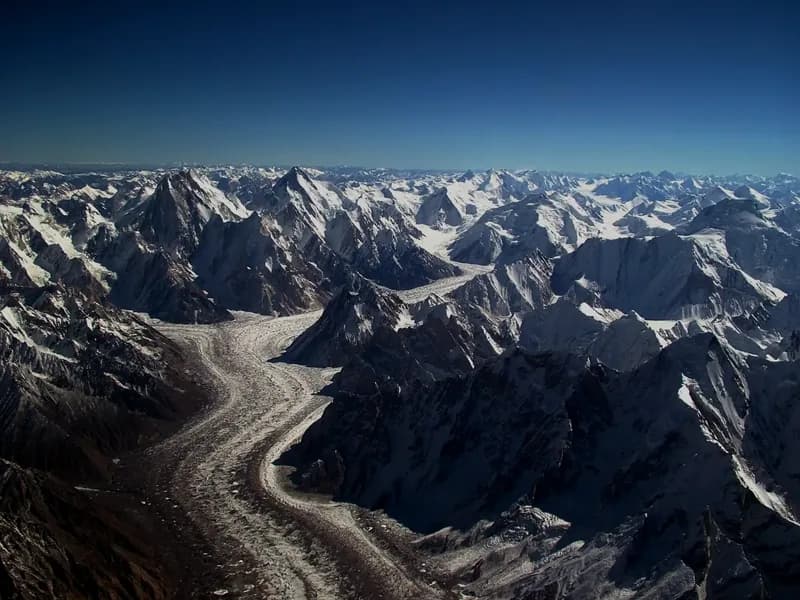
Both expeditions assemble in Islamabad, continue to Skardu and drive toward Askole. The trek follows the Braldu and Baltoro system through established expedition camps. This approach provides progressive altitude gain but also consumes energy. Climbers should not race porters or use the trek as a fitness test.
At Concordia and the upper glacier, the routes separate. Broad Peak base camp sits on its own approach. Gasherbrum teams continue toward the South Gasherbrum Glacier area, requiring additional camp movement and load organisation. Shared lower-Baltoro transport does not mean shared base-camp service.
When comparing prices, verify whether transport, porter stages and base-camp support cover the actual objective. A service quote built for Broad Peak cannot simply be transferred to Gasherbrum I.
Broad Peak normal-route character
Broad Peak’s normal route usually establishes a series of camps on the west side and climbs snow and ice terrain with fixed lines on key sections. Crevasses, avalanche exposure, cold, wind and deep snow can all slow movement.
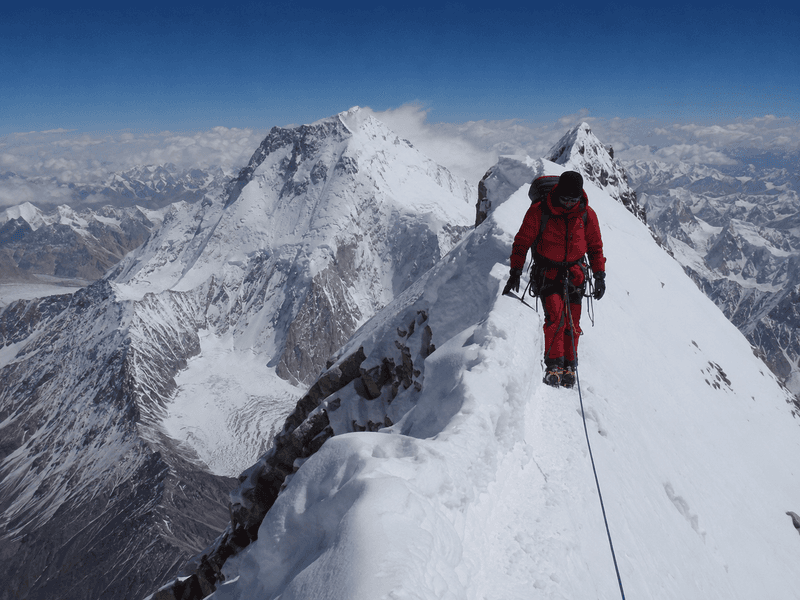
The upper mountain leads toward a col and fore-summit area before the long traverse to the main summit. This geography creates a recurring judgement problem: a climber reaches a high point after many hours, sees more ridge ahead and must decide whether enough time, oxygen, weather and strength remain.
The main summit should be defined clearly. GPS altitude alone is unreliable evidence along a broad, complex ridge. The expedition leader and climber must agree on the intended summit and turnaround rules before the push.
Gasherbrum I normal-route character
Gasherbrum I’s normal route is commonly approached via the Japanese Couloir and associated upper slopes, though exact lines and camp positions vary with conditions. It involves steeper, more technical snow and ice climbing than Broad Peak and may include mixed terrain, exposed traverses and complex bergschrund or crevasse passage.
Fixed lines do not make the route non-technical. Climbers need efficient front-pointing, rope transfer, descending and equipment management. Bottlenecks can form at difficult sections, while falling ice or snow can increase the consequence of waiting.
Route conditions change greatly. A couloir that is snow-filled in one season may be harder ice or broken terrain in another. Reports should be used for background, not as a substitute for reconnaissance.
Technical and objective hazard comparison
Broad Peak’s principal challenge is often described as endurance: high camp work, summit-day length and the ridge. Gasherbrum I adds greater technical intensity. Both expose climbers to hazards beyond direct control.
Broad Peak hazards
- Crevasses and avalanche paths on the lower and middle route
- Deep snow and slow trail breaking
- Cornices and exposure on the summit ridge
- Navigation difficulty in cloud or darkness
- Exhaustion after the fore-summit area
Gasherbrum I hazards
- Complex glacier access and crevasses
- Steep snow or ice and bergschrund passage
- Avalanche, icefall and falling-object exposure
- Technical bottlenecks and retreat difficulty
- Route-finding uncertainty in changing conditions
No historical success rate can predict an individual season. Weather, route, team and decision quality dominate.
Camp and rotation strategy
Both mountains use high camps and acclimatisation rotations. Teams carry oxygen, tents, food, fuel and personal equipment while learning the route. Gasherbrum I’s technical sections can make carries slower and more dependent on fixed-line readiness.
Rotations should create useful acclimatisation without exhausting the climber. A rigid plan—sleep at a named camp on a named date—often fails when snow or wind delays the route. We adapt the sequence to response and conditions.
Some teams combine Gasherbrum I and II, which share parts of the approach but diverge on the mountains. This requires separate objective planning and should not be treated as a simple second summit. Combining Broad Peak with another 8,000er similarly changes permits, duration, oxygen, staff and recovery.
Weather and summit windows
Both objectives operate in the Karakoram summer, with weather windows that may be short and difficult to forecast precisely. A single forecast model should not control the decision. Teams compare sources, observe wind and cloud, communicate with route leaders and retain descent margin.
Broad Peak’s long ridge makes stable duration important. Gasherbrum I’s technical sections make snow condition and wind especially important. A marginal forecast may have different consequences on the two routes.
Crowding also affects a window. A small number of climbers at a steep rope transition can create hours of delay. The expedition should account for traffic, not assume published ascent times remain valid.
Experience standard
Broad Peak can suit a climber with a strong 7,000-metre background, excellent glacier and fixed-line competence, and demonstrated performance on long summit days. Gasherbrum I generally suits someone who has already performed well on an 8,000er and has recent steep snow, ice and mixed experience.
For either mountain, we look for:
- Independent glacier travel and crevasse-rescue knowledge
- Confident fixed-line ascent and descent
- Efficient crampon movement in variable snow and ice
- High-altitude camp competence
- Equipment repair and self-care
- Conservative turnaround decisions
- Recent experience, not only old certificates
For Gasherbrum I, the résumé should show greater technical depth and movement on sustained steep terrain while carrying expedition equipment.
Oxygen and high-altitude support
Supplemental oxygen is an operational system. Cylinder numbers, cached locations, regulator and mask spares, flow rates, carries and emergency reserve must be planned. Gasherbrum I’s slower technical ground may affect expected consumption differently from Broad Peak’s long ridge.
High-altitude porter or guide support must be explicit. Who carries tents? Who establishes camps? Is personal oxygen carried by the climber or staff? Does the service include a summit companion, or only communal route preparation? Read the contract rather than interpreting “full service” from a headline.
Climbers should be capable of using, troubleshooting and changing their own oxygen system. A staff member may be elsewhere when a mask freezes or a regulator leaks.
Schedule and logistics
Gasherbrum I can require more time for the deeper approach, route preparation and technical movement. Broad Peak also needs a full weather and acclimatisation schedule. Exact duration should include:
- International arrival and briefing
- Contingency for Skardu flight or road
- Permit and equipment checks
- Askole and Baltoro approach
- Base-camp establishment and recovery
- Rotations and route preparation
- Weather waiting and summit push
- Complete descent and camp clearance
- Return trek, road and debriefing
Leaving early after a summit attempt is not always possible. Staff and shared camps must be cleared responsibly, and the lower Baltoro still requires several stages.
Price comparison
Broad Peak is often less expensive than Gasherbrum I because of route logistics and permit differences, but the real comparison is itemised. Review current royalties, environment fees, porter stages, base-camp duration, oxygen, high-altitude staff, fixed rope and shared equipment.
A low price can reflect exclusions rather than efficiency. Ask about staff insurance, rescue arrangements, waste removal and whether unused oxygen or extra carries create later charges.
Training focus
Both mountains need aerobic volume, uphill endurance, leg strength and recovery. Broad Peak preparation should emphasise very long summit-day pacing and mental discipline on an extended ridge. Gasherbrum I preparation adds sustained steep crampon work, rope transitions and technical efficiency.
Useful sessions include:
- Consecutive long uphill days with a moderate pack
- Fixed-rope ascent and descent wearing gloves
- Front-pointing and down-climbing on firm terrain
- Crevasse-rescue refreshers
- Tent, stove and oxygen practice in cold conditions
- Long efforts followed by controlled descent, not stopping at the top
Choosing the right peak
Choose Broad Peak if your experience supports an 8,000-metre attempt, your technical systems are independent and your main strength is sustained high-altitude endurance. Choose Gasherbrum I if you already have strong 8,000-metre performance and recent technical snow, ice and mixed competence.
Neither is the correct choice when the schedule is too short, insurance is unclear or the climber depends on staff to solve basic personal systems. Another 7,000er or Gasherbrum II may create a stronger progression.
Decision checklist
- Is my recent high-altitude record suitable for this route?
- Can I descend steep fixed lines efficiently while exhausted?
- Have I trained for the summit day and the return to base camp?
- Are oxygen and high-altitude support itemised?
- Is the main summit definition clear?
- Does insurance name the peak and cover 8,000 metres?
- Are permit, fee and staff-insurance costs current?
- Can I accept a no-summit outcome without pressuring the team?
Internal planning links
Compare the Broad Peak Expedition with Gasherbrum I and Gasherbrum II. Continue with our K2 vs Broad Peak comparison, guided versus private expedition and expedition fitness guide.
Frequently asked questions
Is Gasherbrum I harder than Broad Peak?
On the normal routes, Gasherbrum I is generally more technical and complex. Broad Peak remains a severe 8,000-metre expedition with a very long summit ridge and major objective hazards.
Which is better as a first 8,000er?
For a suitably experienced 7,000-metre climber, Broad Peak is generally the more logical of these two. Gasherbrum I usually fits climbers with prior 8,000-metre performance and stronger technical résumés.
Can Broad Peak and Gasherbrum I share one base camp?
No. They share the lower Baltoro approach, but their upper-glacier access and base-camp systems differ. A combined plan requires separate logistics and permits.
Why is Gasherbrum I called Hidden Peak?
The name reflects how the mountain is concealed from some approach views by surrounding terrain. Gasherbrum I is the standard modern name used for the 8,080-metre peak.
Is supplemental oxygen used on both mountains?
Yes, many commercial climbers use it on both, while some attempt without it. The choice affects logistics, staff, cost and emergency planning and must be made early.
Which expedition is longer?
Gasherbrum I often needs additional time for deeper base-camp access and technical route work, but actual duration on either peak depends on weather, acclimatisation and conditions.
End of field note
Continue your research.
Browse all notes